In the last post, I showed how to turn a photo into a stencil. This time, we’ll be adding a lace effect to this photo.
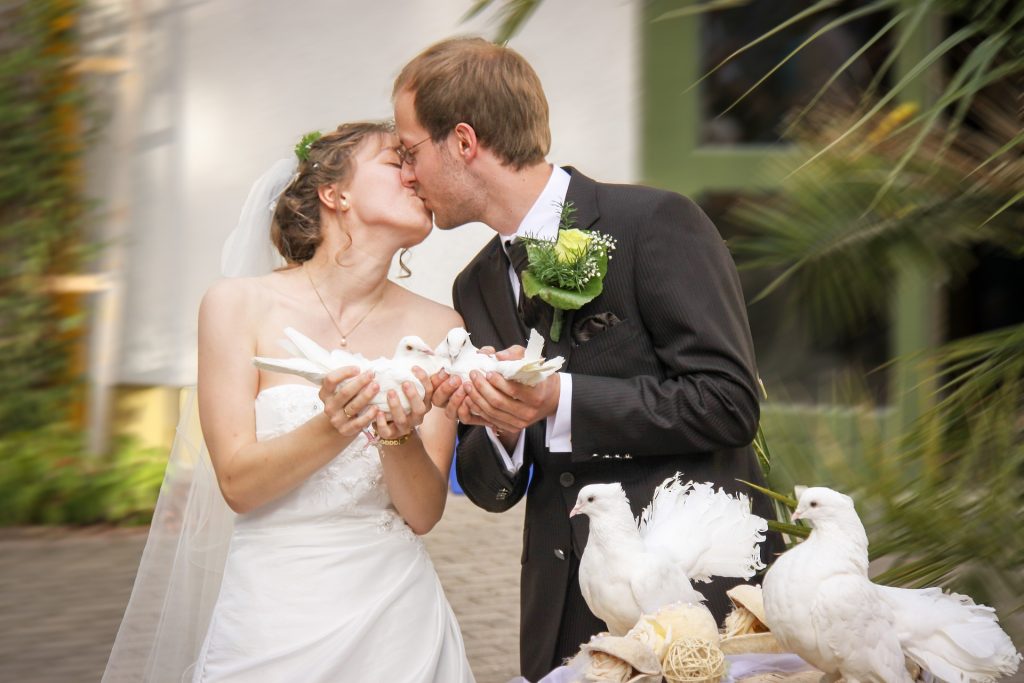
Wedding Kiss – Courtesy Pixabay and Peter Klaus
Using this photo:
Chrysanthemum from Windows 10 default photo set
After inserting the photo and changing the background colour, go to Picture Tools>Format>Picture Corrections. Set Sharpnessto 100%. The picture may look worse at this point, but don’t worry.
The photo has had Sharpness applied to the maximum
Now, set Contrastto 100%. Yep, it definitely looks worse.
Photo with 100% Contrast applied
Select Picture Color and adjust Saturationto 0%
Photo with Saturation reduced to zero
Things are looking up again. Select Picture Tools>Format>Color>Set Transparent Color. Click on a black portion of the picture.
The photo with black portions removed
Now is the time for a little cropping and copying that will make the lace effect stand out.
Cropping and mirroring the photo, makes it look more “lace like”
And finally, layer the lace over the Wedding Kiss photo for the result.
The combined photo
This post is originally from 2018. If you want help with the newest and classic features in PowerPoint drop me a line at catharine@mytechgenie.ca
Duotone photos are the current thing online and you can buy software or use a service to convert your photos into duotone photos. But did you know that you can easily create duotone photos in PowerPoint?
Along the way to this technique, I’ll show you how to make stencils and lace out of your photos as well.
Stencils
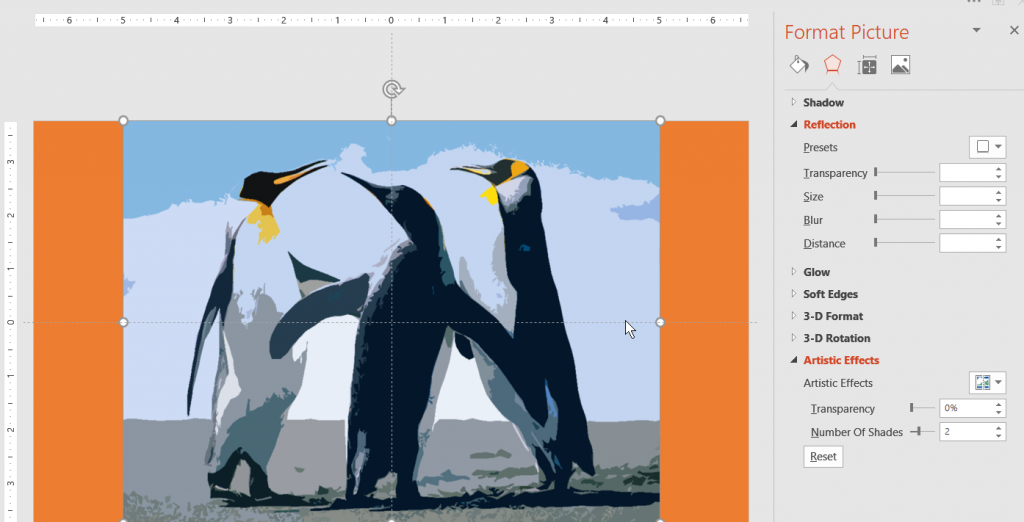
Windows 10 default penguin photo
I’m going to use this photo of penguins to make a stencil type image. I’m using Office 365, but this can be done in PowerPoint 2010 as well. I’ve also changed the background colour of my slides. This isn’t necessary, but will make the images easier to understand.
After inserting the photo and changing the background colour, go to Picture Tools>Format>Artistic Effects. You can use either the Photocopy effect or the Cutout effect. The main difference will be the amount of small detail retained by the photo. I like the Cutout option with this photo.
The first step in creating a stencil, applying the Cutout Effect
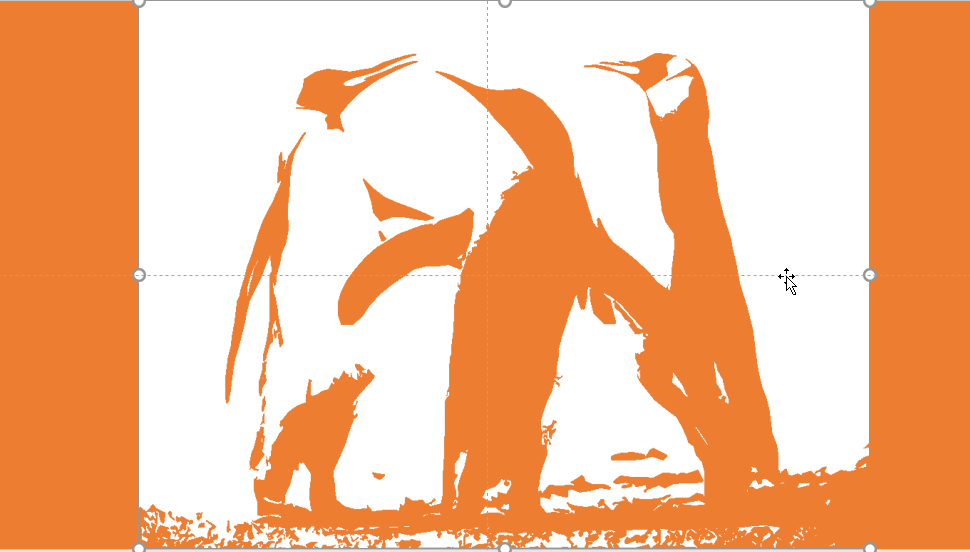
Reduce the number of shades to 1
The Cutout now has a the number of shades reduced to zero
Select Picture Corrections and adjust Contrastto 100%
The contrast on the picture is now 100%
Select Picture Color and adjust Saturationto 0%
Saturation on the picture is now set to zero, removing the small blue highlights that were visible before.
Even if you are on Office 365, you’ll need to use the Ribbon. The Set Transparent Color command is not on the Picture Color Tab. Select Picture Tools>Format>Color>Set Transparent Color. Click on a black portion of the picture. Voila! A stencil of Penguins that takes on the colour of the slide background.
After the black portions of the picture have been removed, the slide background is visible.
You can use a variation on this technique to make a “lace” overlay.
This post is originally from 2018 If you want help with the newest and classic features in PowerPoint drop me a line at catharine@mytechgenie.ca